Thursday, July 27, 2006

60 Minutes to Meltdown

I tried a test today to see how long a mini mousse cake would hold up on the counter in my 83 degree kitchen (or on the table at the wedding).

Imagine the dessert table beautifully decorated with trays of mini mousse cakes when the meal begins... 30 minutes later.

After the test we decided to put the mousses on trays and pass them to the guests direct from the refrigerator rather than set them out on the table.

The good news is the summer coating is working for the piped decoration. It's sliding off the mousse cake, but it's intact.

Posted by Picasa

Wednesday, July 26, 2006

Lavender Rose Petal White Chocolate

This is not the final version but it's close enough that this photo can be a placeholder for now. The cake wall will be lavender and white, but it will probably be lavender diamonds against white. This is one of my newly-piped summer coating decorations... which hasn't bent over from the heat... at least not in the first five minutes. Note that the white chocolate ganache on the top has begun to flow. My newer version of the ganache is a bit more stable in the heat.

I just received a bag of professionally crystalized rose petals to use on the final version, but I'm still waiting for the decorating grill to make the diamond cake wall.

You probably can't see it here, but there are a couple of flecks of gold on the top. I ordered $35 worth of pure (edible) gold flakes but I have no idea how many flakes are actually in the box because it's opaque and they don't make noise when you shake it. I think they weigh a gram, so it could be a lot because they're so light that they get caught on wind currents when you try to shake them out of the holes and there's no way you can get them to hit the cake. You have to put them onto waxed paper and flick them one-at-a-time onto the cake top. There's probably a better way but I haven't found it yet. It's a bit of work, but I think we all need to eat a little gold at least once in our lives and Kris and Shaun's wedding is a good time to do it.

Rosemary Lemoncello Mascarpone

This one was finalized (approved by Shaun) and photographed today.

The trickiest part was getting it photographed before the chocolate decoration melted. Due to the rather hot weather we are experiencing here in Southern California, real chocolate turns to putty in a matter of minutes and a puddle soon thereafter. My next piping session will be using chocolate colored summer coating to make the decorations.

Choosing the cake wall is what gave me the hardest time. I tried green and white but it looked like a watermelon with the strawberry glaze on top. That would have been a surprise to bite into. I also tried other variations of white and yellow that didn't work so I tried brown and yellow, which worked... but we liked this one better.

The mousse filling is made with mascarpone and lemoncello. There's a frozen rosemary cream insert that defrosts in the center of the mousse and leaves a rosemary accent. The lemon wedges are crystalled. Even the fresh rosemary tastes good in this combination but I suspect most people won't try it.

The really bad part about this project is that I ate half of the cake while I was cutting the cake walls yesterday. I like to believe that scrap calories don't count, but I don't want to test that theory too thoroughly. I'm pretty relieved that the tasting part is almost over... I say almost because there is still of tray of them in the refrigerator. Help!!

Chocolate Chipotle Mousse Cake

I finalized the mini Chocolate Chipotle Mousse Cake first. This is a very chocolately mousse with a hint of chipotle. The cake wall is chocolate with a tinted orange relief design. The top is covered with a poured ganache (not the best example of a smoothly-poured top, but the only one left to photograph). This is a dahlia petal on top, but most likely we'll be using marigold petals. It also has a textured wafer of chocolate, cocoa nibs, and a sprinkle of chipotle powder on top. Beware!

Strawberry Lemoncello Mousse

With only a few weeks left to the wedding... (aargh!) I began working with what I had at hand to translate the cakes flavors into mousse cake creations. I made these with some leftovers from the first lemoncello mousse.
Our class picture. The end of another wonderful week at the San Francisco Baking Institute. Life can't get any tastier than this.

Fruit Tarts

We prebaked pastry shells then put pastry cream on the bottom and glazed fresh fruit on top. A light sprinkling of sucraneige gives them that frosty look (sucraneige is a powdered sugar that doesn't melt into the glaze... hmm).

Petite and Large Mousses

This is a Chocolate Whiskey Mousse Cake baked in a dome-shaped mold. A black ganache is poured over the top and flows down the sides as it freezes to the mousse. Then we decorated it with lattice piped chocolate pieces and sugared hazelnuts. This photo doesn't show the shine, but it was beautiful!


Here is the tray of delightful mousse cakes I brought home to Shaun and Kris. After 6 hours in the car they didn't look quite this good, but they were still good enough to inspire them to want them for their wedding.


Here we have a Lemon Blackberry Mousse Cake. It has a purple wave design cake wall and a frozen blackberry insert in the center of the lemon mousse. The insert defrosts with the mousse and adds a highlight of blackberry to each bite. We made the gold-starred chocolate wafers on a transfer sheet. Simple and delicious.


This Raspberry White Chocolate Mousse Cake has a insert of frozen raspberry in the center of the white chocolate mousse. The cake wall is made on a relief mat using a colored decorating paste and then a cake layer over that.


Off to the right you can see the Chocolate Mint Mousse Cake that we sprayed with chocolate. This cake has a creamy frozen mint insert at the center.

Chocolate Mint Mousse

I love this photo. It totally captures the spirit of our week. Vivien is taking a turn at using the paint sprayer to spray a velvety chocolate coating on the Chocolate Mint Mousse Cake and Cakelets.

This is a standard paint sprayer from the hardware store. Brian assured us that it had never been used for paint. When I asked if there was a specific type of sprayer we should ask for, he suggested that it should have "Power" somewhere in the name. This one did... standing less than two feet away from your target could blow it right off the pan. Well, at least it felt that powerful.

Somehow I didn't get a close-up of our finished mousse cake, but here are some little volcanic petit fours molded from the same mousse and power sprayed while frozen. That's a candied hazelnut glued to the top with chocolate and a square of that delicious pastry we used for the strawberry tarts on the bottom.

Parisian Macaroons

Aging gracefully... the Parisian Macaroon. Here we have an almond meringue, piped into circles and baked. The colors represent the flavors, but there is actually no flavoring in the meringue. The flavor comes from the ganache center which is piped onto a cooled meringue circle and topped with another circle. Then they are put into the refrigerator to soften and soak up the flavor of the filling. Heavenly!

The flavors here are caramel raspberry, chocolate, pistachio, coffee, and lemon. This is absolutely the best possible thing to do with leftover egg whites. It's easy and makes a stunning gift in a cellophane bag tied with a gold ribbon. And they only get better with age!

The Ultimate Challenge

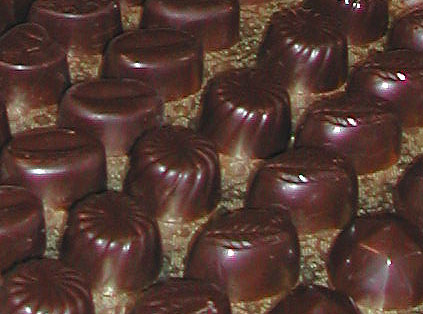
So we had the lecture on chocolate. The secret to tempering chocolate is never do it in a room hotter than 70 degrees or cooler than 60 degrees... unless you are doing it at SFBI on the day they are stoking up the hearth oven for bread and pizza. Oops, sorry this is the real world.

Brian had set the chocolate to melt overnight in a special chocolate warmer so we had a headstart. And even though the temperature of the kitchen was increasing, we began the process of tabling (cooling part of the melted chocolate on a granite slab then stirring it back into the remaining melted chocolate). We also seeded a batch (adding unmelted chocolate to the melted chocolate to align the crystal formation to produce the "right kind" of crystals... the ones that make chocolate shine and snap.) Brian showed us how to test the temper on a piece of paper so we'd know when it was ready for use.

We poured the melted chocolate into rigid plastic molds, let it drain out to form a thin (not thick) shell, and then set them on a rack to cure in the molds overnight. We could see already that the temper was right in spite of the less than perfect conditions in the kitchen. There were no white bloom streaks or grainy gray areas where the cocoa butter rises to the surface. Brian has spent a lot of time with chocoate and knows how to coax those crystals into alignment.

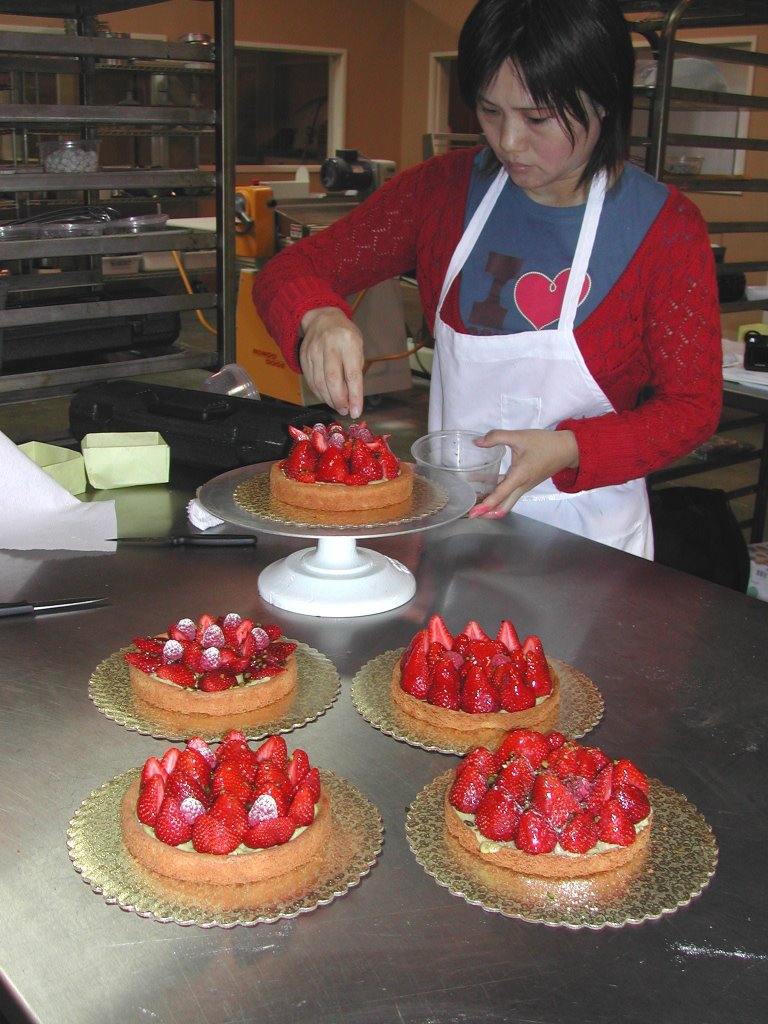
The next day we piped our fillings into the chocolate shells--coffee, lemon, pistachio, raspberry caramel, and dark chocolate ganache leftover from the Parisian Macaroons we'd made earlier in the week. We let the fillings sit to settle and develop a crust on top. The final step was to close them with more tempered chocolate. This was an incredibly messy job that required a bit of finger licking prior to hand washing at the end.

When the bottoms were set, we tapped the molds on the table to release our perfect chocolates. I gave everyone little boxes I'd folded the night before to put their candies in.
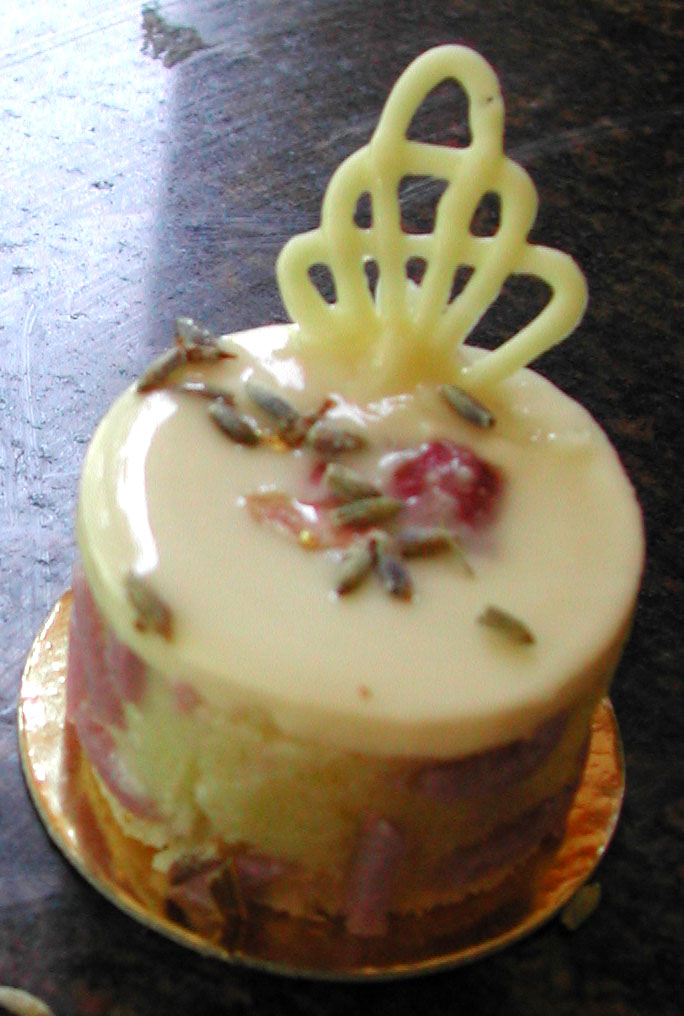
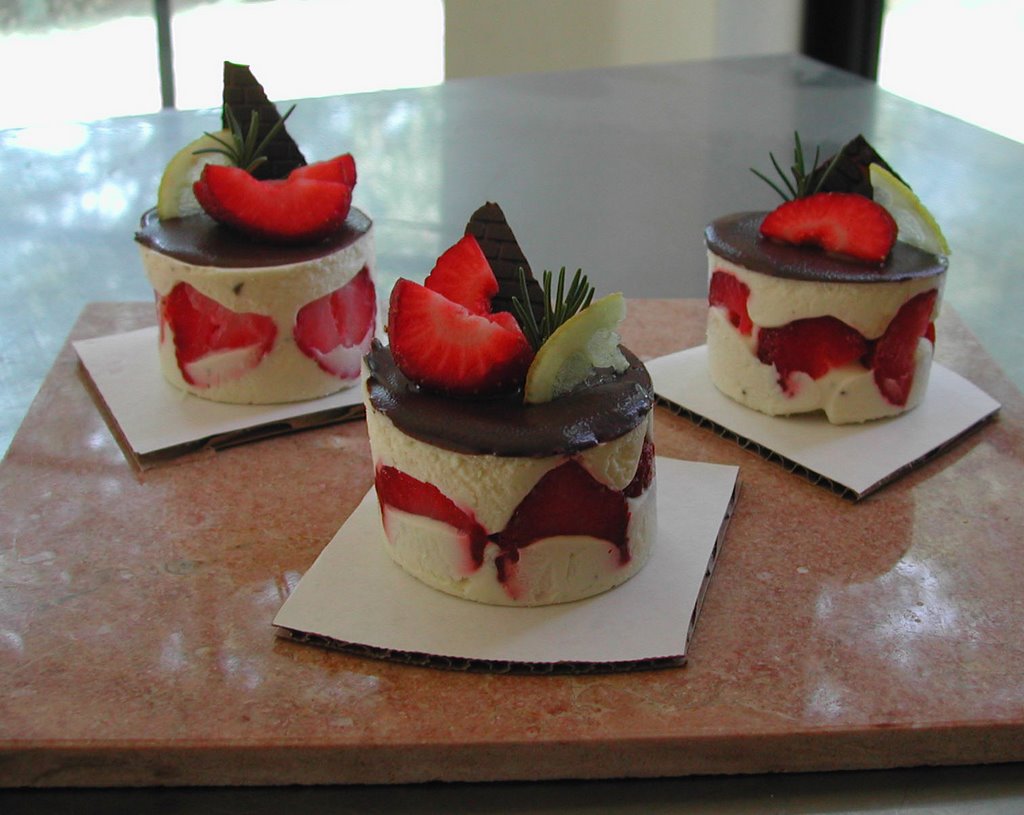
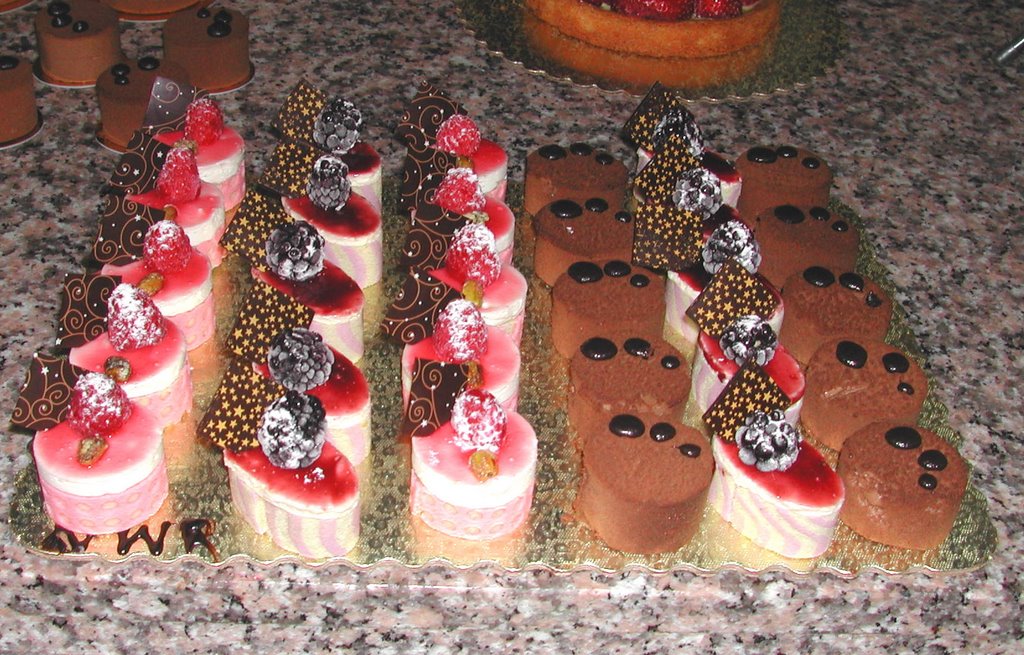
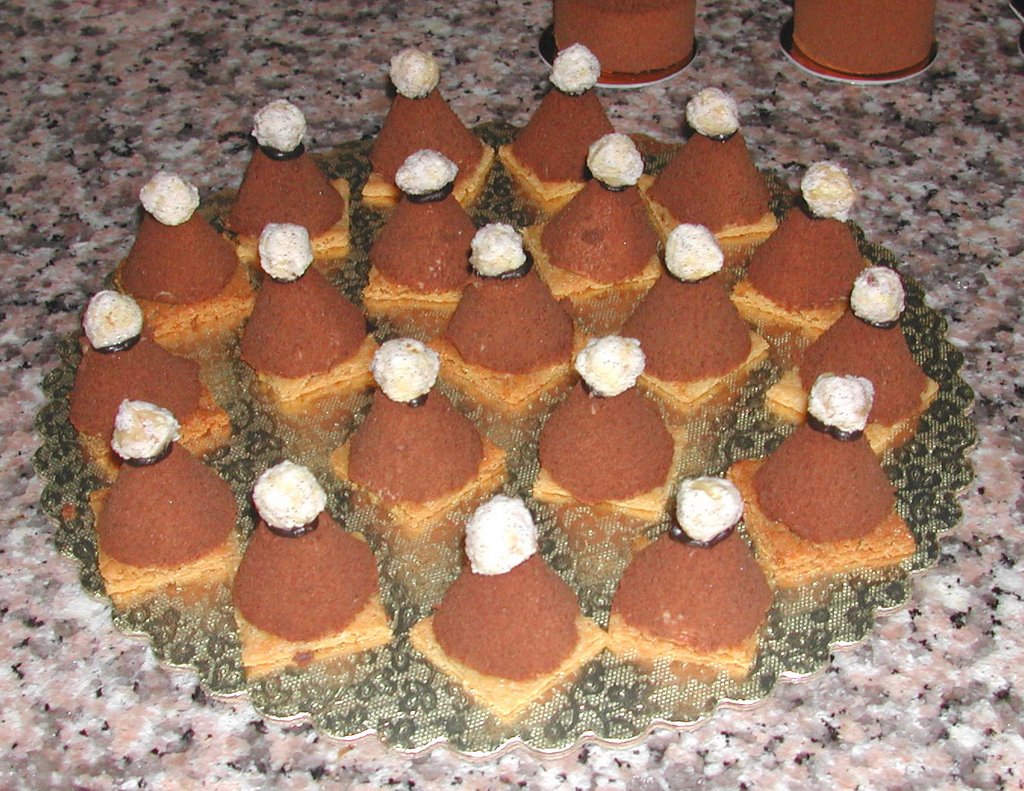
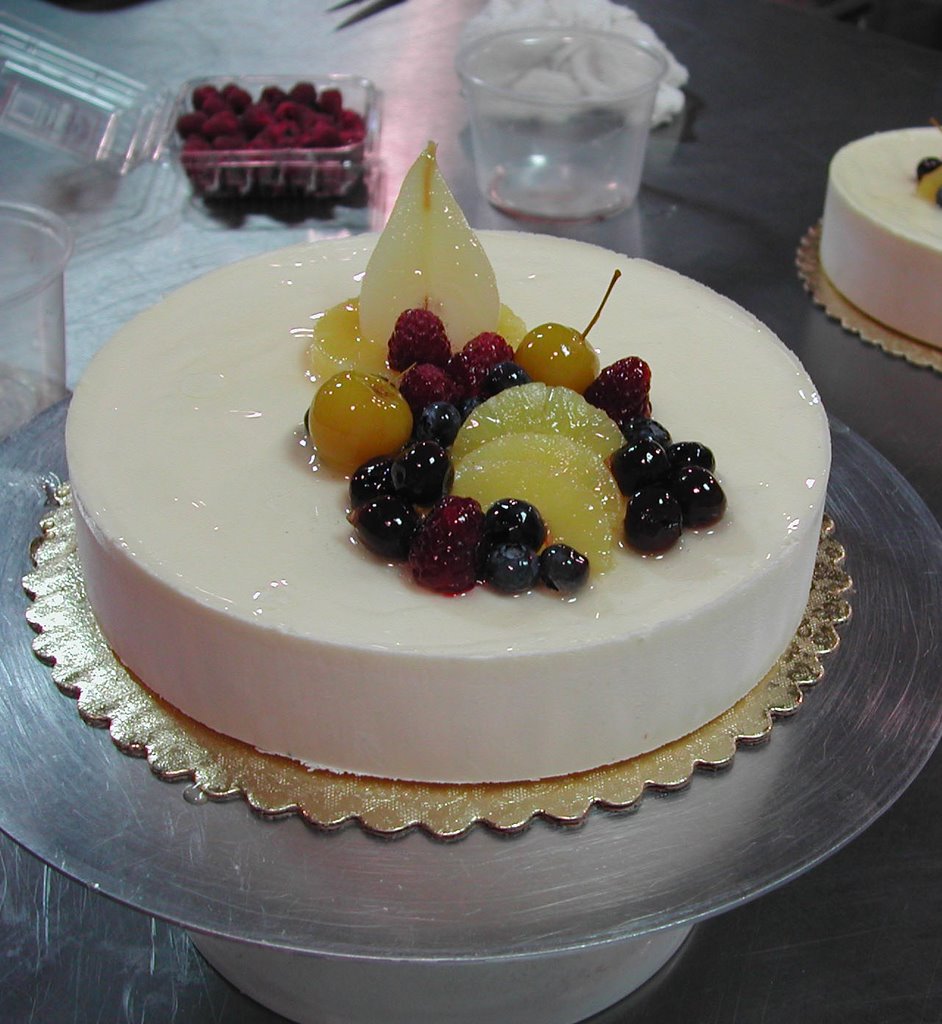
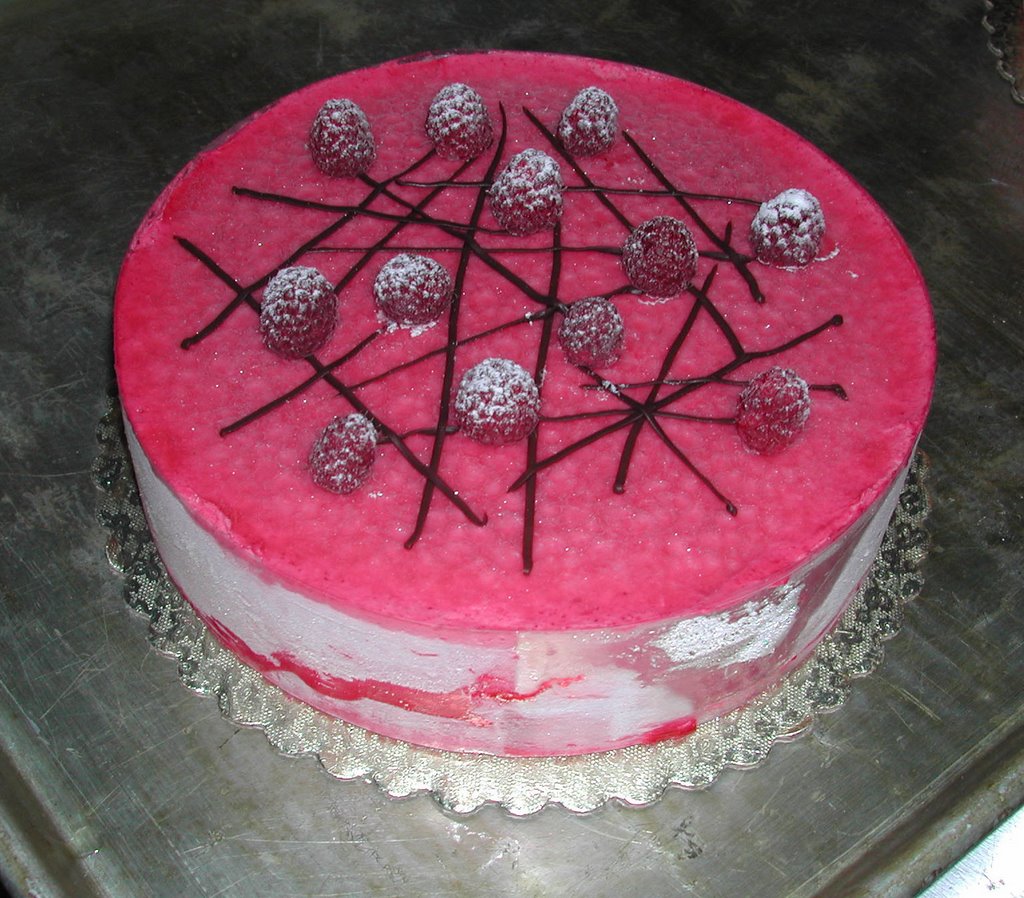
Final Touch

My classmate Vivien is putting the final touch on her Strawberry Pistachio Tart. The other tarts were done by my tablemates, Wendy and Randy, and Vivien's tablemate, Michele. This is just the beginning!

SF Baking Institute - Pastry III

Okay, here they are, the pictures I promised... a few weeks later, well more like a month.

When I arrived home Shaun and Kris saw the array of mini mousse cakes I made in SF and we switched to mousse cakes for the wedding. So it's been wild and crazy trying to order the forms and ingredients and work out the recipes and decorations. Plus I'm putting in work experience hours writing web content for The Berry Man, a local produce distributor, so I have spent my writing hours on that... up until today.

This is a pistachio cream tart. It's a pistachio pastry cream on the bottom with fresh strawberries and sugared pistachios on top. The pastry for this tart was made the night before and allowed to rest. It's very rich. Then we cut out fairly thick circles of pastry and put them into 7" cake pans to bake. The sides of the tart actually rose up as it baked to form a perfect tart shell... well, my second one was perfect. I got a little carried away with the pastry sheeter so my first one was unsatisfactory. This one I rolled out with a rolling pin to exactly the correct thickness. Trust me, it was delicous. This one didn't make it home to Santa Barbara. Posted by Picasa

Sunday, July 2, 2006

The Final Display

"Get it all out and display it," said Brian as he walked away. This is just a portion of what we had ready to take home on Friday.


Here we are looking a bit worn, but pleased with our results.


I'm quite excited about this next week, where we will be making even more complex finished pastries. Keep watching the blog for new photos.

More Pictures

Here's my Bavarian Cream. It's decorated with a baby pear, baby pineapple, and two miniature apples (that look like golden cherries). We also had raspberries, blueberries, and brandy-soaked cherries to work with. Each piece of fruit is coated with a gelatin glaze to give it the shine.


And here is my Chocolate Mousse Cake. We encased a layer of chocolate cake in chocolate mousse. Then we refroze it and prepared our ganache glaze--brought it to the proper pouring temperature.

This is the good side. I was trying to get mine done so that other people could glaze theirs. Glazing a frozen mousse is not a good thing to do in a hurry... so mine is a little more artistic than those with the smooth perfectly-covered sides. A hair dryer would probably fix this, but I'm happy to leave it as is to illustrate the process. The trick is to get the ganache to flow down over the sides before it freezes in place.

Our final job was to decorate the top. Brian had made the chocolate cigarettes and the transfer sheet pieces to use. We choose what we wanted to use and arranged it to taste (so to speak).

Saturday, July 1, 2006

Raspberry Mousse

This raspberry mousse is still frozen and I didn't take the acetate strips off the sides before I photographed it. Oh well.

Brian described the pattern on top as pick-up sticks. I need to practice my stick piping a little. The fresh raspberries sit nicely on the really wobbly parts.

There is a layer of chocolate cake enclosed in mousse at the bottom and a puree glaze on top. It's more difficult to see the difference when it's still frozen and has the acetate strip fogging up the side view. A couple of hours in the refrigerator and it will be perfect.