 Here they are in all their luscious beauty.
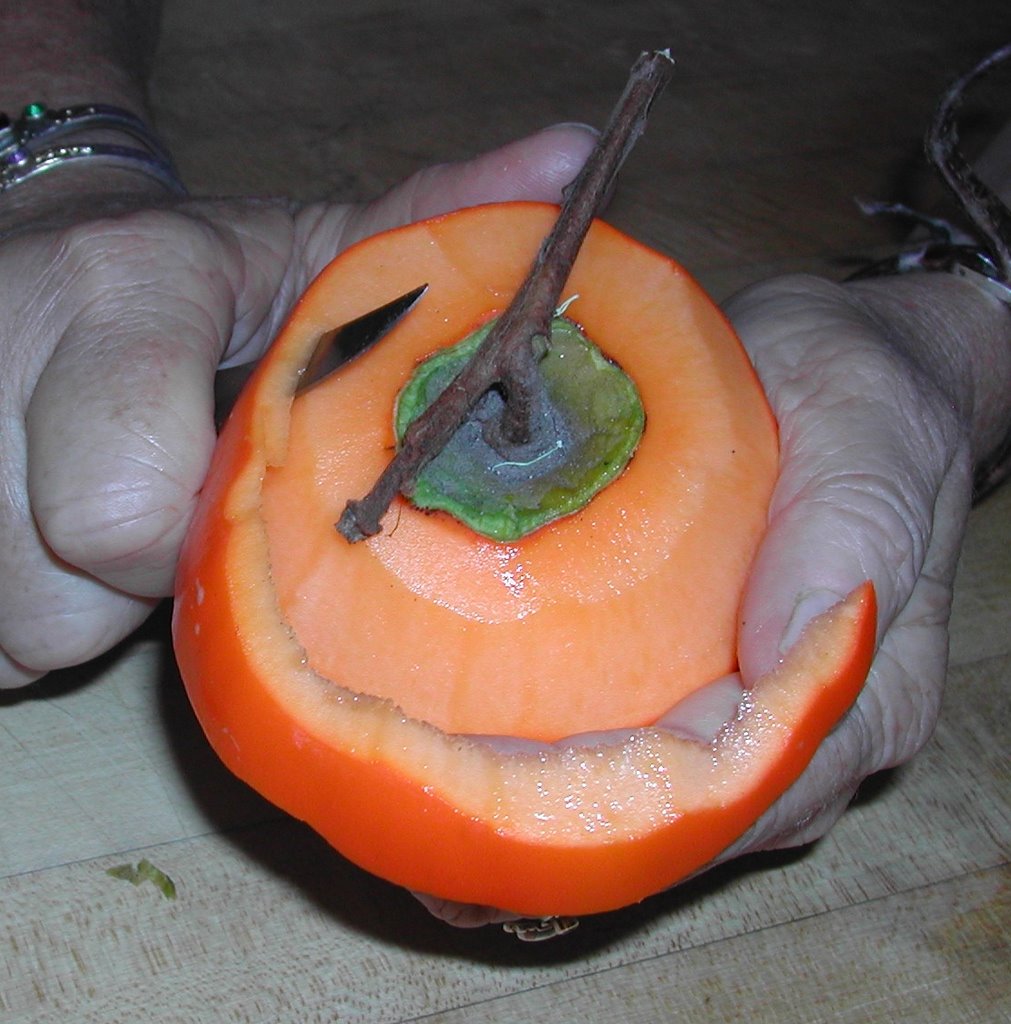
Dave harvests another 50 persimmons.
 He is getting pretty good at this!Here they are in all their luscious beauty.He is getting pretty good at this!


 It's that time of year in So. California when the Persimmon trees are laden with fruit and you realize you only need a couple of persimmon puddings for the holidays, so what the heck are you going to do with all those persimmons.
 Here are some persimmons eagerly awaiting their first massage.
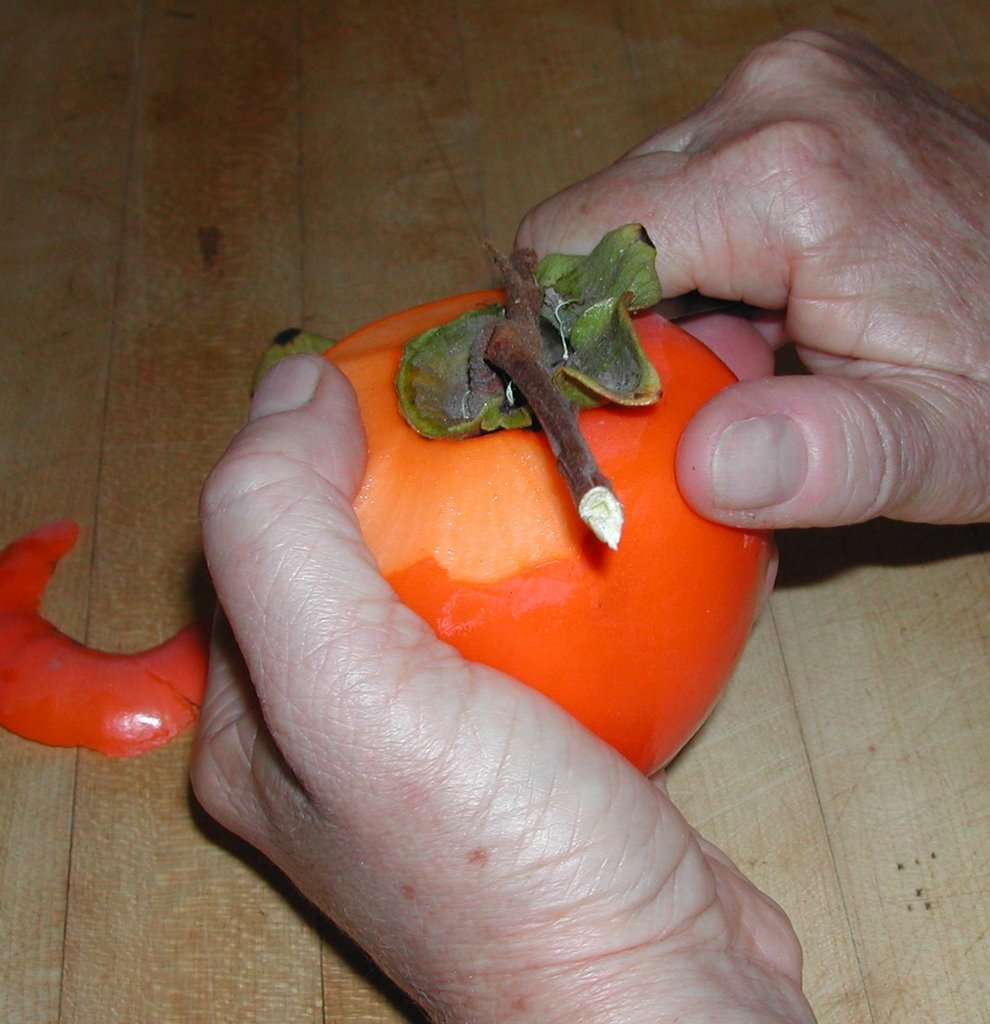


 These are the green nuts picked right from the tree. They have a fruity hull that turns black if not removed soon after picking.
 This pistachio has opened naturally on the tree. That means it is fully developed. The raw (undried) pistachio tastes fruity and a little citrusy. The texture is more fruitlike. It doesn't have the crunch of a dried pistachio.
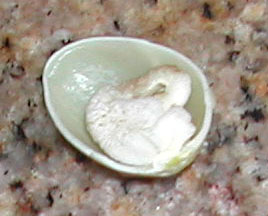 Here is a freshly picked pistachio that didn't develop. I'm guessing that's because pollen from the male tree didn't reach this flower. A lot of the nuts that don't shake off the tree easily contain these undeveloped pistachios that look a bit like embryos. The shells on these are tightly closed. But some of the closed-shell pistachios do contain fully developed kernels.
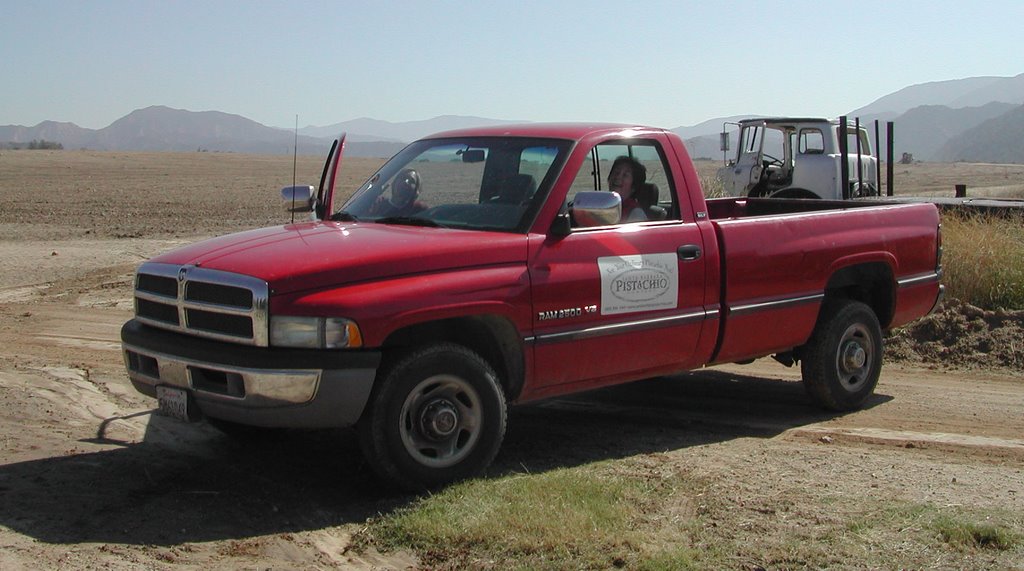 Gail and Gene Zannon own 380 acres of pistachio trees in Cuyama, California. Since I'm doing marketing writing for their pistachio company, they invited Dave and me to come see the harvest. The harvest lasts two weeks out of the year. we arrived on the first day. Gail drove us out to to watch.
 Here are the clusters of pistachios ready for harvesting. All of the orchards are in transition to organic. This one, however, is fully organic and will be their first certified organic crop. Everyone was especially excited to see the pistachios coming off these trees.
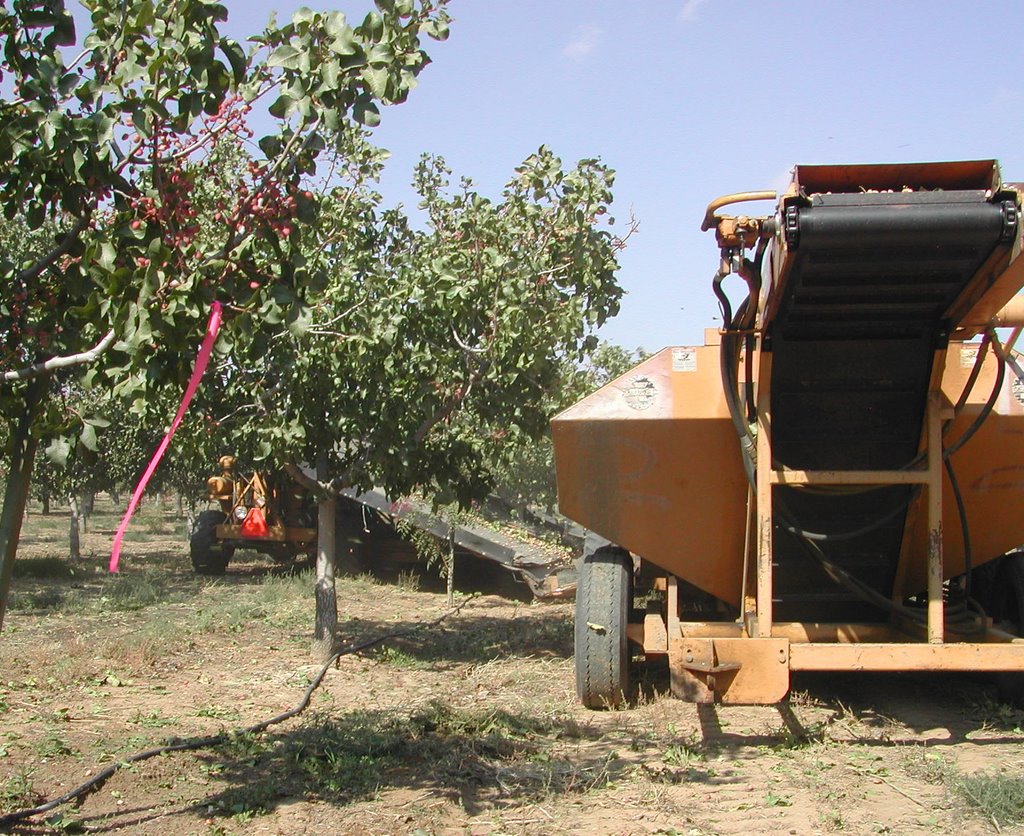 It takes 5 seconds to harvest a tree. A mechanical shaker encircles the trunk of the tree, giving the tree a fast sturdy shaking. Ripe pistachios fall into a collector and the driver moves on to the next tree.
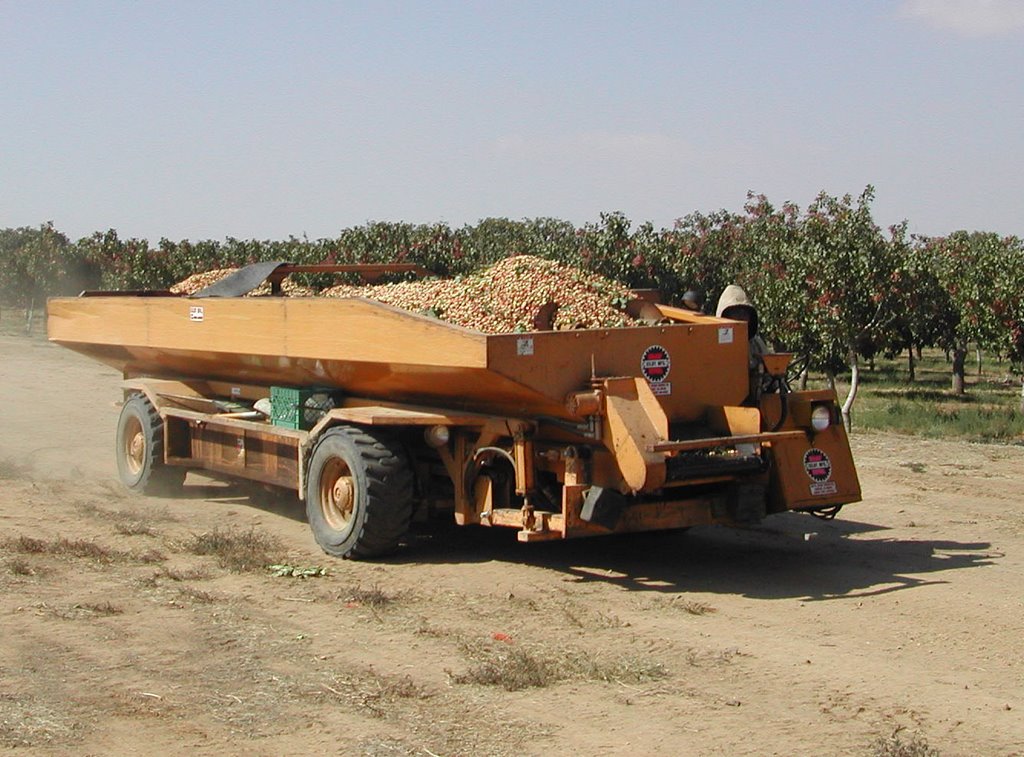 Here is a collector filled with freshly harvested nuts. These nuts are rushed to the processing plant to be husked, dried, and sorted. If they are not husked within 24 hours, the husks will turn brown and stain the inner shells.
 So I've been talking a lot about pistachios lately. And anyone who has stopped by our house recently has probably tasted my pistachio clusters, pistachio macaroons, pistachio cranberry oatmeal cookies, or pistachio raspberry cake. Hmm, notice a common thread here?
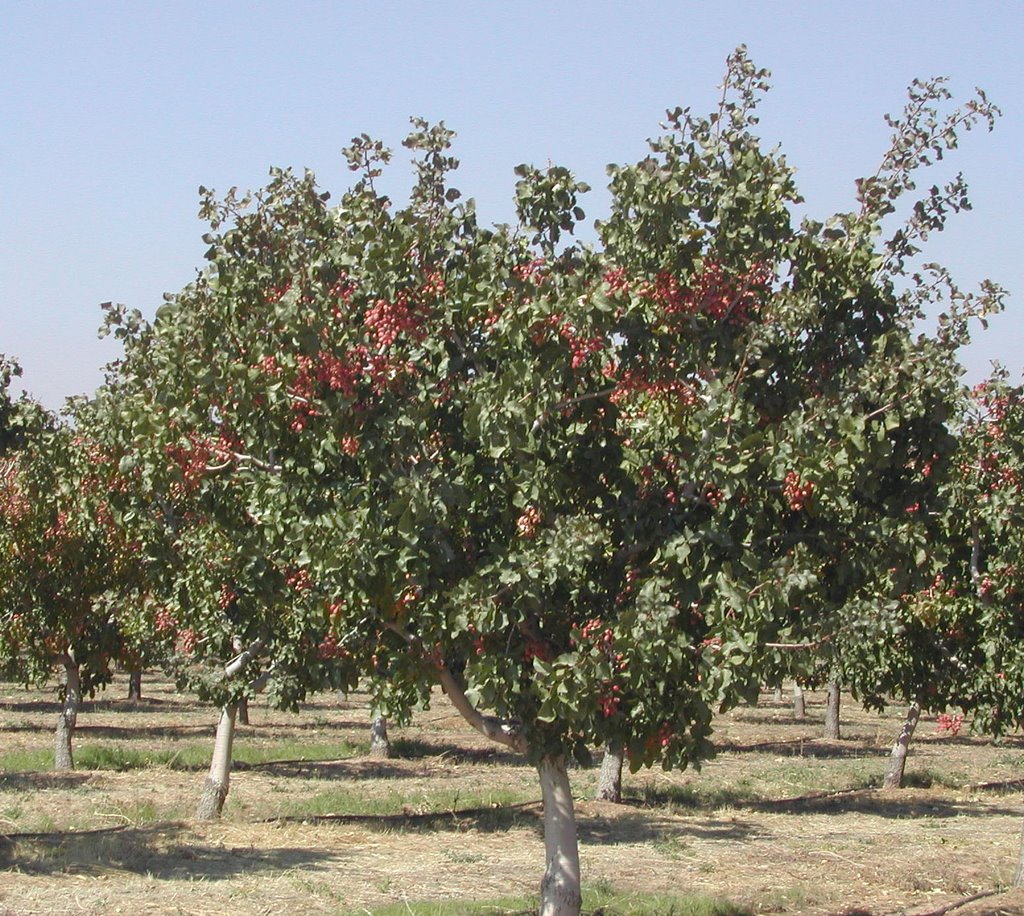 We'd guessed that we were getting close to the store when we started seeing these trees at the side of the road. Pistachios grow in red clusters on the female trees. Most of the trees in the orchard are female trees. These are young trees. It takes a tree about 1o years to develop and begin to produce a significant crop of pistachios.
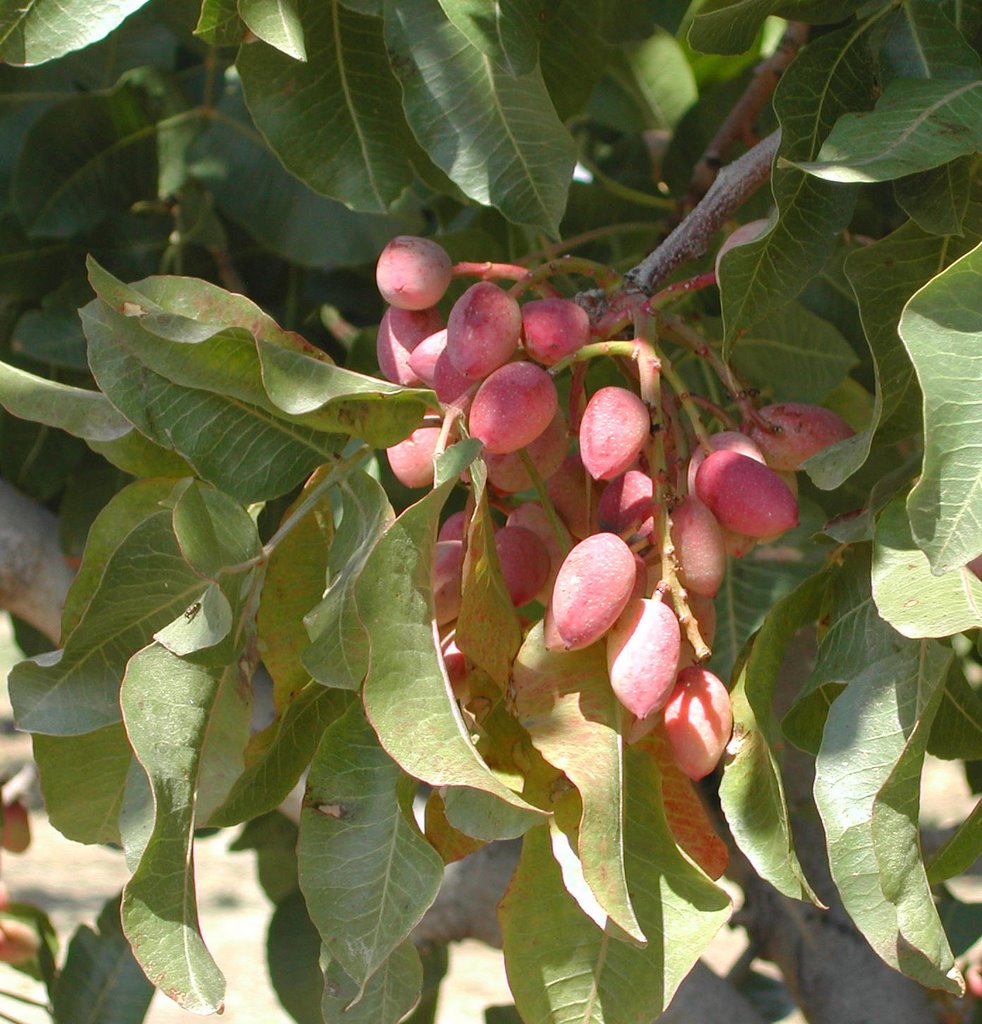 And here are the progeny. The pistachios hang down in clusters, like grapes. On the outside is a lovely red fruity husk. You peel that off and inside is the hard shelled nut we recognize as a pistachio. The trick is to try to leave the clusters on the trees long enough for most of the shells to crack open inside the husks (called open shell pistachios). Many pistachios are harvested earlier and then the ends are cracked open artifically. Those nuts aren't as rich and delicious as tree-ripened nuts, but the farmers don't risk loss from rain or wind which can cause the tree to drop its ripest nuts before the harvest.
 Here she is putting it all together.
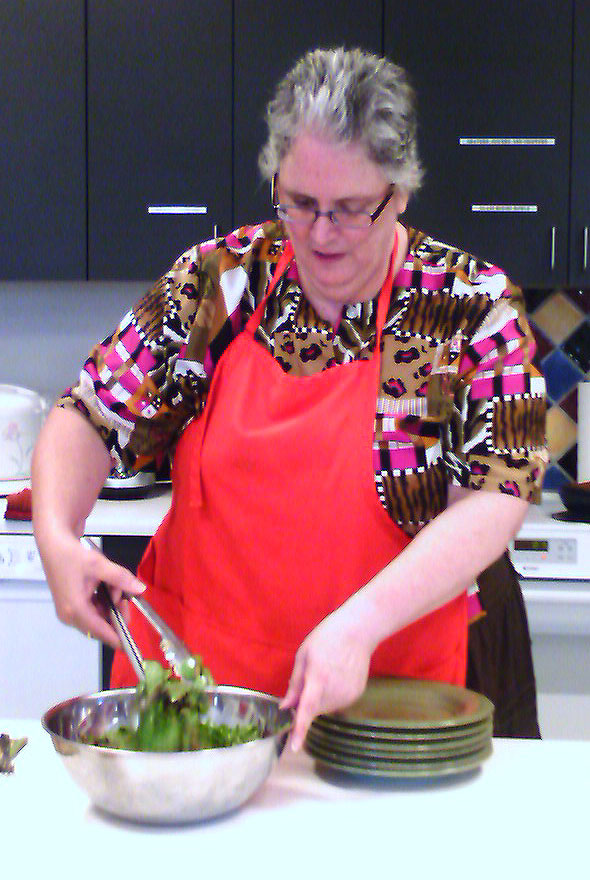 Salad anyone? While we ate Jane's salad we talked about the flavors in the salad and laughed about the days when salad was a wedge of iceberg lettuce with a dollop of Thousand Island dressing on top.
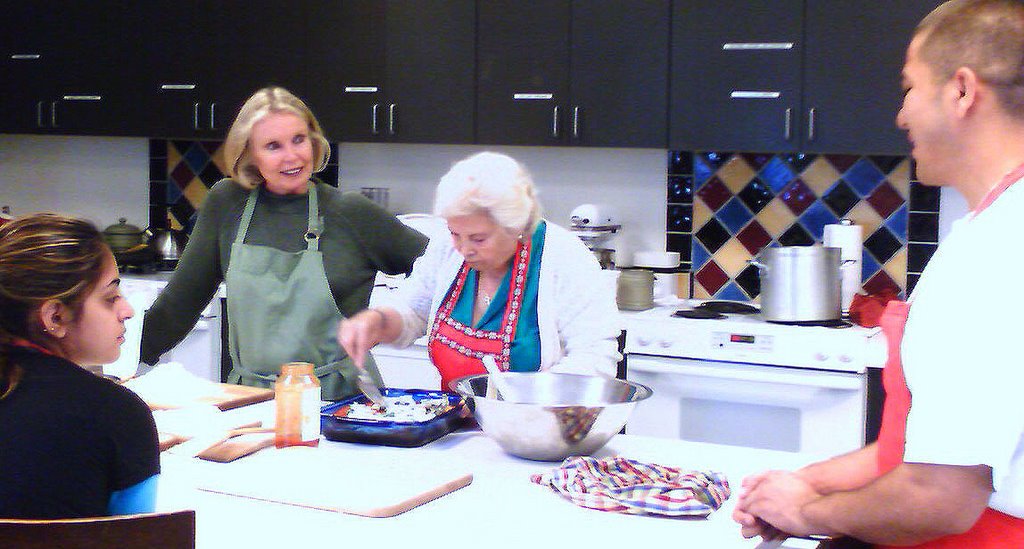
 The recipe said it would take an hour, but Fortuna said it's done when it begins to bubble. We were relieved to hear that because once the aroma began to escape from the oven we didn't think we could wait a whole hour to taste it. We also noticed that a lot of people started dropping into the classroom to see how things were going.
 This is Shaun's photo of the lavender cake before I added the taller flowers and transferred it from the cake saver to the tile. The pink color of the cake shows up better here. I also think I like it better without the taller flowers. Simple is really more elegant.
 Adam and Cindy make the first cut into the Lilikoi Chiffon Cake.
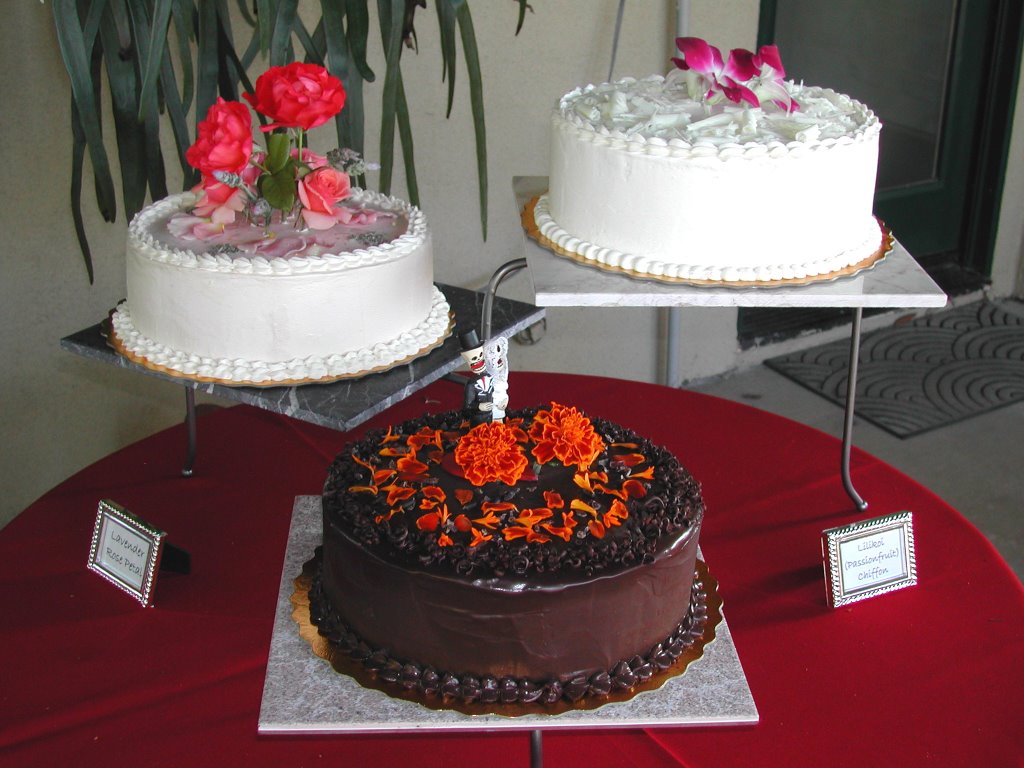 Here is the cake display. What a relief... no dropped cakes, no leaking cakes, no transit damage.
 And here it is! The final Lilikoi Chiffon Cake. The flavor of Adam's childhood in a cake.
 This cake is light pink with white borders. The rose petals on top were picked from Kris' mom's garden, brushed tenderly with egg white and lightly dipped in superfine sugar. Then they were dried until crisp as a rose petal potato chip.
 This is the actual wedding cake. As a result of its popularity, there are no photos of the taster cakes.
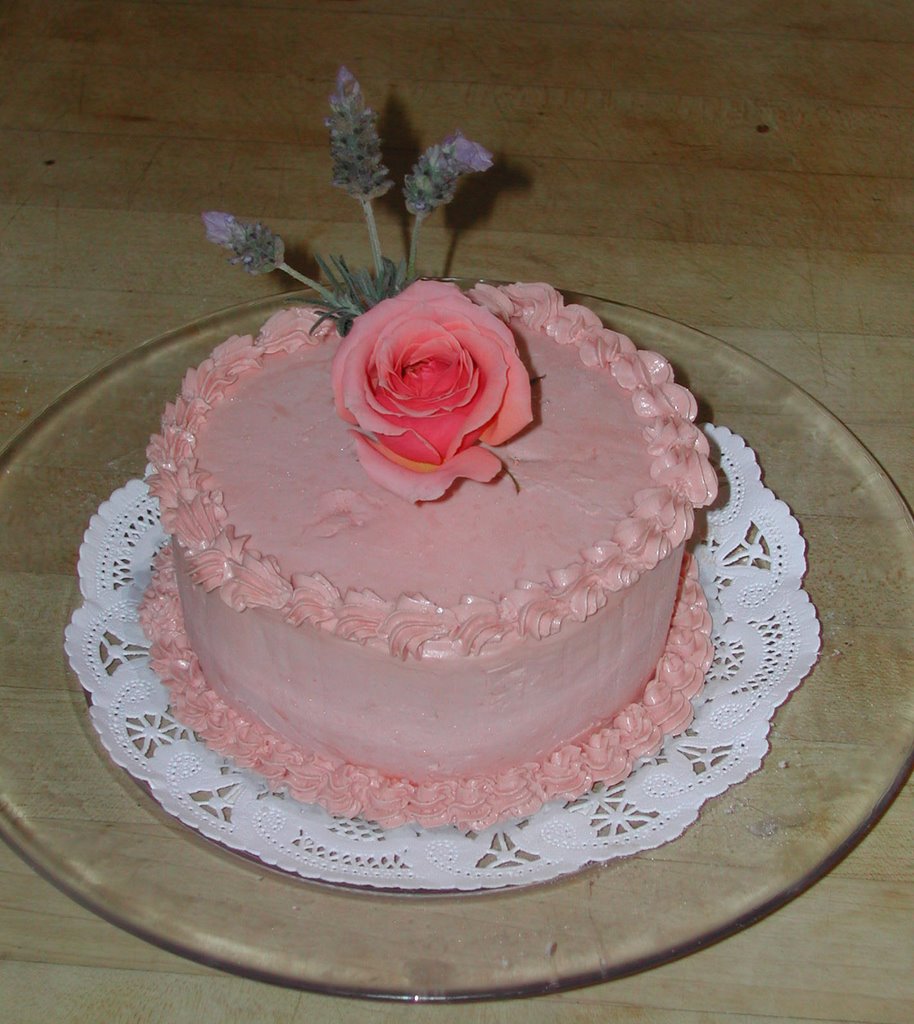 Time to move on to the lavender rose petal cake. The filling for this cake is rose lavender chamomile mousseline. Mousseline means pastry cream with lots of butter beaten into it. Melt in your mouth delicious.
 My friend Kathi happened to have a birthday during the two weeks of cake development. She mentionned that she liked passion fruit and I just happened to have a batch of passion fruit filling and some cake layers on hand. All we needed were the candles.
 Adam's and Cindy's wedding was this past Saturday, two weeks after Shaun's and Kris' wedding. They wanted Chocolate Chipotle, Lavender Rose Petal, and Lilikoi (Passion Fruit) Chiffon 10" cakes.
 A large playful wave sent our roses back onto the beach and got a lot of us wet as we ran for dry sand, laughing and happy that we were on the beach in California on a warm August day.
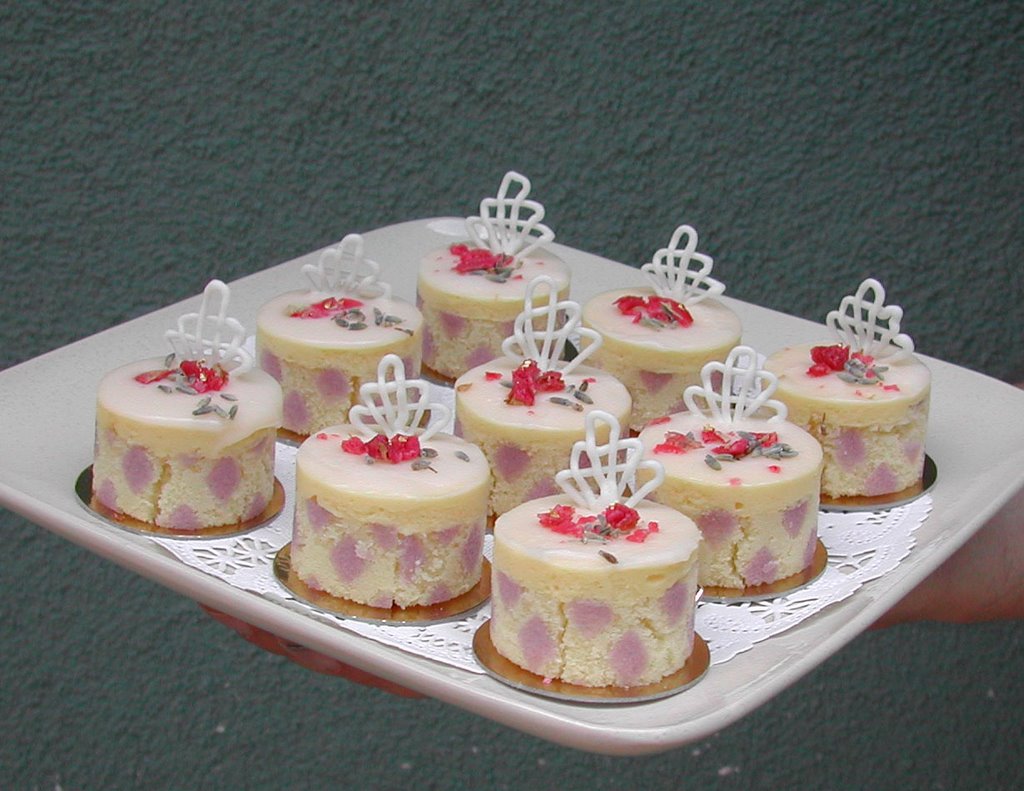 This is how the final lavender rose mousse cakes looked on the plates we used to serve them at the wedding. No meltdowns.
 I tried a test today to see how long a mini mousse cake would hold up on the counter in my 83 degree kitchen (or on the table at the wedding).
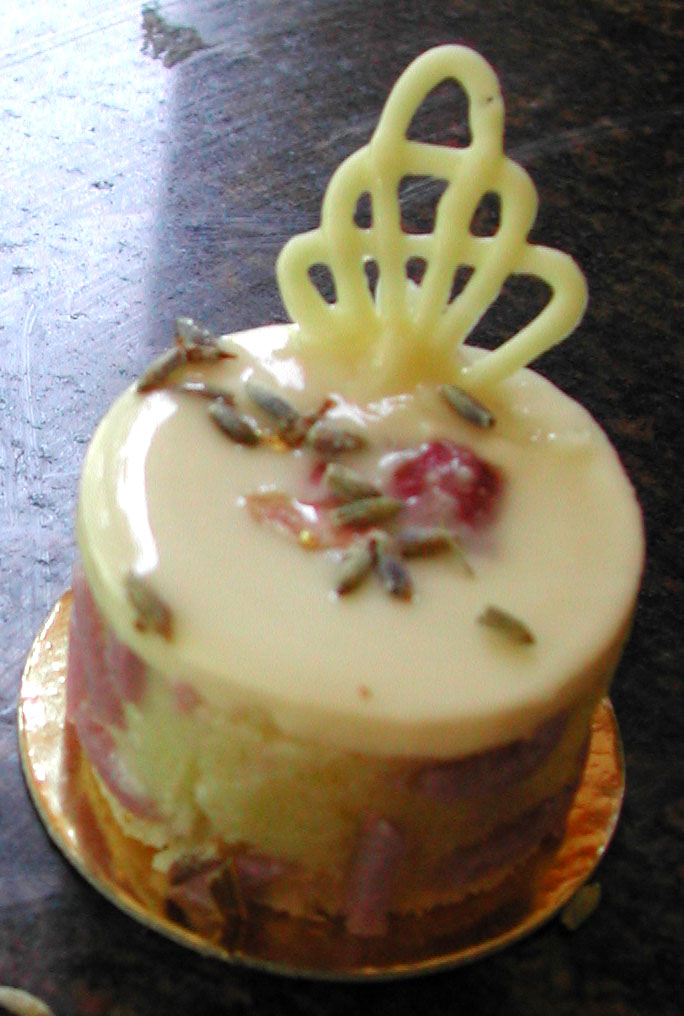 This is not the final version but it's close enough that this photo can be a placeholder for now. The cake wall will be lavender and white, but it will probably be lavender diamonds against white. This is one of my newly-piped summer coating decorations... which hasn't bent over from the heat... at least not in the first five minutes. Note that the white chocolate ganache on the top has begun to flow. My newer version of the ganache is a bit more stable in the heat.
 This one was finalized (approved by Shaun) and photographed today.
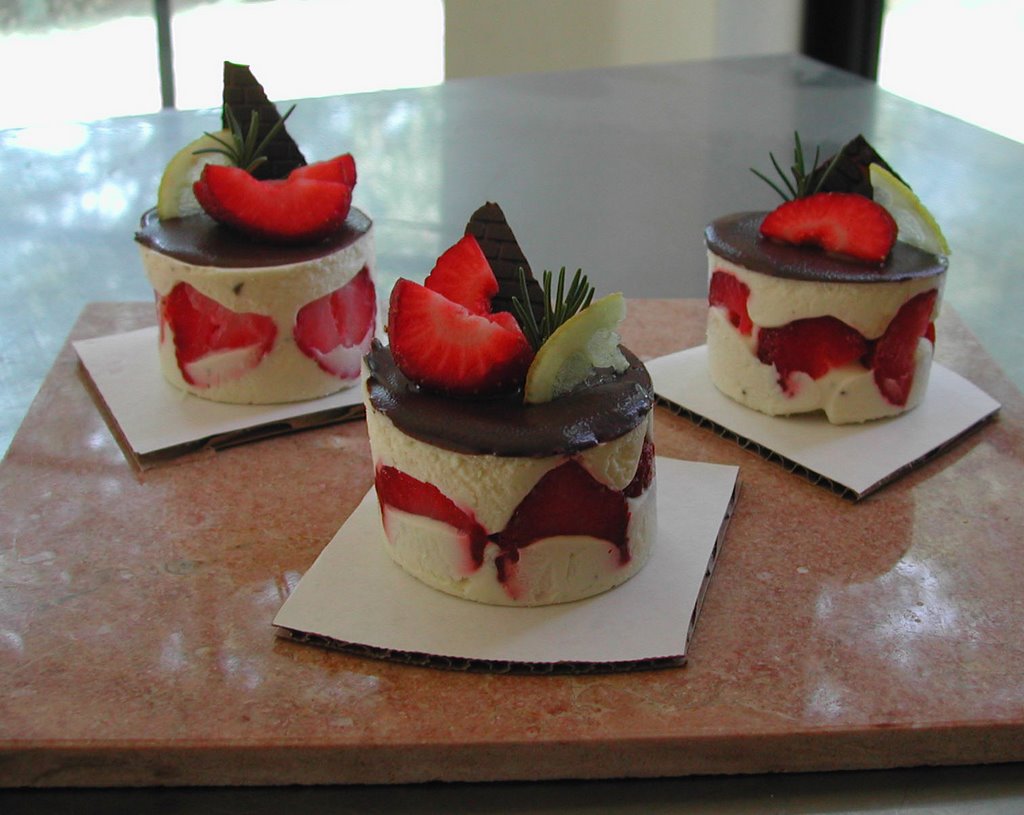
 I finalized the mini Chocolate Chipotle Mousse Cake first. This is a very chocolately mousse with a hint of chipotle. The cake wall is chocolate with a tinted orange relief design. The top is covered with a poured ganache (not the best example of a smoothly-poured top, but the only one left to photograph). This is a dahlia petal on top, but most likely we'll be using marigold petals. It also has a textured wafer of chocolate, cocoa nibs, and a sprinkle of chipotle powder on top. Beware!
 With only a few weeks left to the wedding... (aargh!) I began working with what I had at hand to translate the cakes flavors into mousse cake creations. I made these with some leftovers from the first lemoncello mousse.
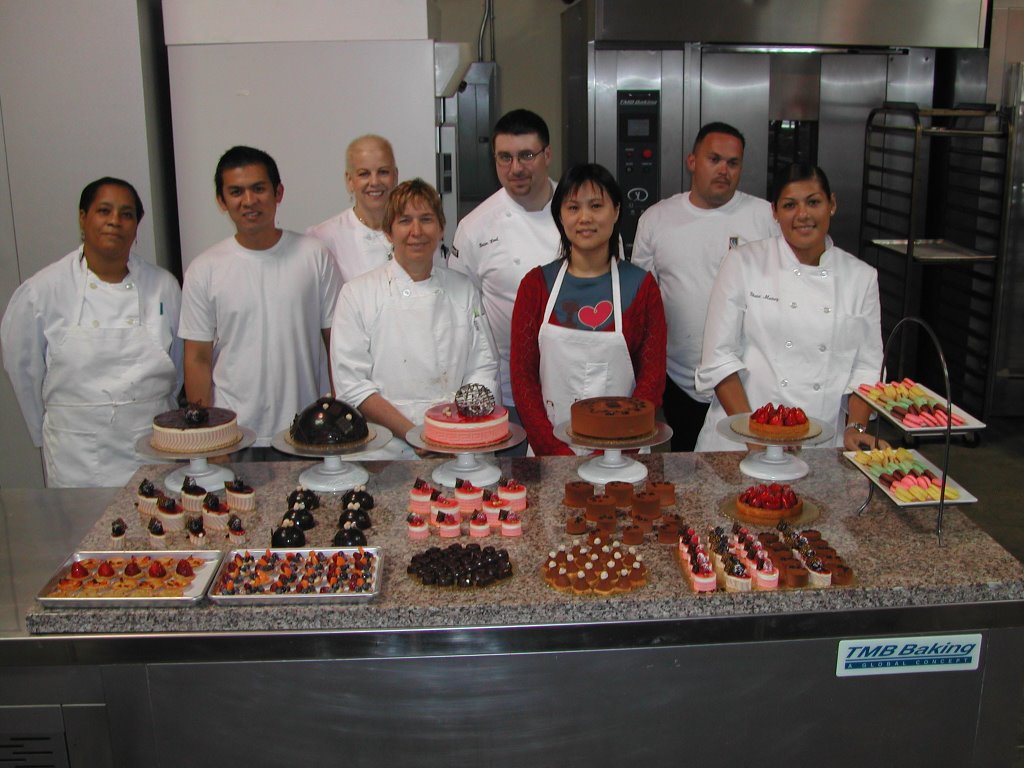 Our class picture. The end of another wonderful week at the San Francisco Baking Institute. Life can't get any tastier than this.